You can assign a Route template or a Route Group, via Route template details or by right clicking on a vehicle in the list of vehicles or directly on the map.
For the first option, go to the Route template details panel and click Assign as route button:

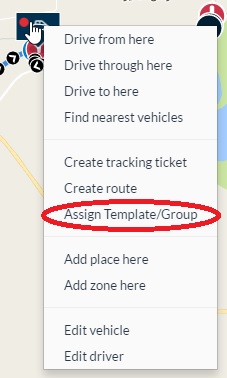
For the second option, go to the Map view and right click on the vehicle marker or on the respective vehicle of the vehicle list:
 |
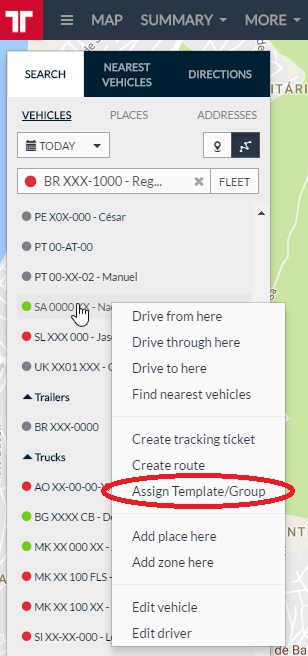 |
After that, click Assign template/group.
Independently of which way you choose to assign a template/group, the outcome of this step is the same: the Assign route template/group panel will be displayed to you.
Depending on the value which you select for the Schedule type field, a different panel will be available to you. You can select the following values:
- One time
- Weekly
- Route Group
Following is depicted the differences between the scheduled types.
- Schedule type - One time

It contains the following information:
| Fields | Details |
| Vehicle | List of all the vehicles in your account. You can select the one which you want to assign the route. |
| Schedule type | One time: you will assign the route template to this vehicle just once. That means that once the route is completed (or abandoned), the vehicle will not have to do it again. |
| Route | List of all the route templates. |
| Route start time |
Starting time of the route. Note: by default, it will be considered now. |
| Send route to WFM/NAV |
If the selected vehicle has compatible NAV terminal, you are able to selected Yes and send the route template to the terminal. |
| Starting and Ending points |
If the template has multiple steps, and you want to execute just some of these steps, you may choose one of them as start and/or end point for the route. |
For the case depicted in the previous picture, we are assigning a One time schedule type route to the vehicle SA 0000 XX.
This vehicle has also a compatible NAV terminal, so we are able to define if we want to send the route to the device. By selecting Yes on the Send route to WFM/NAV field, the route will be sent according to the preferences defined in Administration > Account > Route. For this case, Send destinations only is the Send mode defined.
- Schedule type - Weekly

It contains the following information:
| Fields | Details |
| Vehicle | List of all the vehicles in your account. You can select the one which you want to assign the route to. |
| Schedule type | Weekly: in case you will apply the route to certain days of the week. Every such day, the route will be repeated. |
| Route | List of all the route templates. |
| Weekly | List of the weekdays in which this route will occur. |
| Route start time |
Starting time of the route. Note: by default, it will be considered now. |
| Starting and Ending points |
If the template has multiple steps, and you want to execute just some of these steps, you may choose one of them as start and/or end point for the route. |
- Schedule type - Route group

| Fields | Details |
| Vehicle | List of all the vehicles in your account. You can select the one which you want to assign the route to. |
| Schedule type | Route group: in case you want to assign already created groups of routes to the vehicle. |
| Route group | List of all the route groups. |
| Route start time |
Starting time of the route. Note: by default, it will be considered now. |
For more details about route groups click here.
After you are done filling the options, click the Assign button and a confirmation pop-up will be displayed to you:
