Sometimes, you want to make sure that a vehicle is following the path which was assigned to it. For that, you can create a corridor around the desired path and then be alerted if the vehicle leaves that corridor. You can also use corridors to monitor other types of behavior, as you will see below.
First, you need to create the corridor. A corridor is created after the calculation of the best path. Then, you can associate one or more monitoring alarms to that corridor. These are the steps:
- Calculate the best path between the start and finish points;
- Create a corridor around the calculated path;
- Associate the monitoring alarms to the created corridor.
Firstly, with the output of the calculation of the best path, you will have the following:

Now, by moving the mouse over the calculated path (blue line), the path becomes highlighted:

To create a corridor around the identified best path, right click on the corridor and select ''Create corridor'' from the menu:

After that, the following panel will be shown to you:
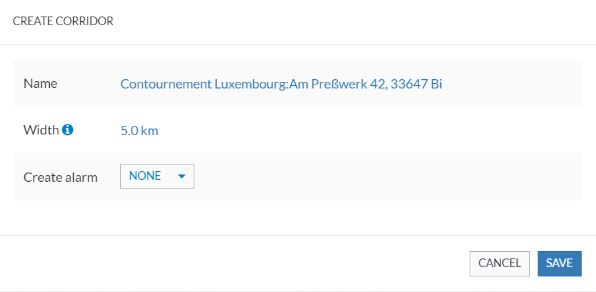
It contains the following information:
| Field | Description |
| Name |
Identification of the corridor's name. If you want to change the name, click on the blue link and enter the desired identification on the available text box. NOTE: By default, Frotcom will suggest the name of the corridor as the starting point and ending point separated by ':.' |
| Width |
Selection of the width (from 0.1 Km to 50 Km) of the corridor you want to establish around the chosen path. After selecting the width, we strongly advise you to check its effects on the map regarding coverage area, to make sure it serves your purpose. NOTE: please understand the width of the corridor as a geographical restriction for the alarms that you will associate in the Create alarm field. It's similar to the Only inside field of the Alarms restrictions. By increasing or decreasing the width of the corridor, you are changing the area in which the assigned alarms will be triggered. Therefore, it is important to fine-tune it for increased accuracy. |
| Create alarm |
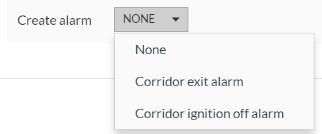
Selection of the alarm to be linked with the corridor. You have three options:
None Corridor exit alarm Corridor ignition alarm |
Corridors with different width:
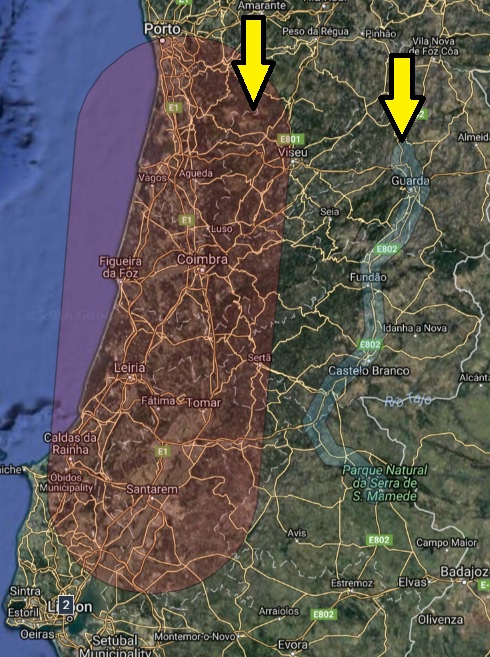
Both corridors have similar lengths. The corridor on the left (in red) has a width of 50 km. The corridor on the right (in blue) has a width of 5 km. It is important for you to fine-tune the width of the corridors since it will shape future alarm events that you might receive.
When you are done with the options for the fields of the Create corridor panel, click on Save:
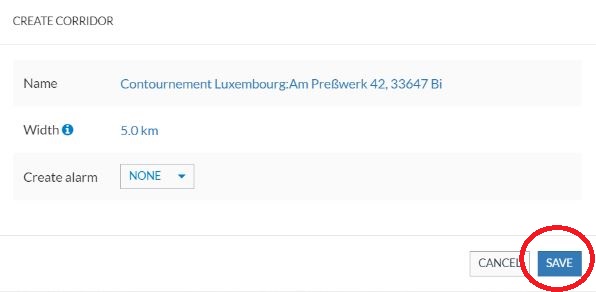
Otherwise, if you want to cancel the corridor creation, click on Cancel.
If you create the corridor, you will see the following confirmation pop up:

If on the Create alarm field of the Create corridor panel, you select the Corridor exit alarm or the Corridor ignition off alarm, Frotcom will automatically redirect you to the alarm details page.
After the alarm is created, you can click on the corridor representation on the map with a left click and with a right click:
| Left mouse click | Right mouse click |
 |
 |
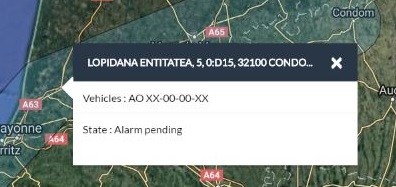
With the left mouse click, you have the corridor infobox which shows you the following information:
- Name of the corridor
- Vehicles associated with the alarm which is related to the corridor
- State of the alarm associated with the corridor. The state can be Alarm active, Alarm pending or no alarm.
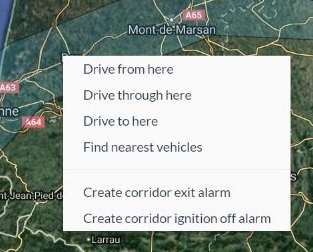
With the right mouse click, you have the usual options when you click on a map point and two extras because you are clicking on a corridor:
- Create corridor exit alarm
This option allows you to create a corridor exit alarm associated with a particular corridor. - Create corridor ignition off alarm
This option allows you to create a corridor ignition off alarm associated to a particular corridor.
You can manage all the created corridors under the Administration > Areas folder.
If you want to know how to create a corridor, click here.
If you need further clarification, please contact your Frotcom Certified Partner. You can find the contacts of the Frotcom Certified Partners here.